Operating Instructions
The basics of how to use the Sharp Sighter
1. Reflector Module Installation
*ALWAYS UNLOAD the firearm BEFORE mounting the SHARP SIGHTER™ tool.
- Level your rifle platform as you would for scope mounting.
- Wipe clean your barrel surface and the precision Vee to remove any grit. This improves repeatability and prevents damage.
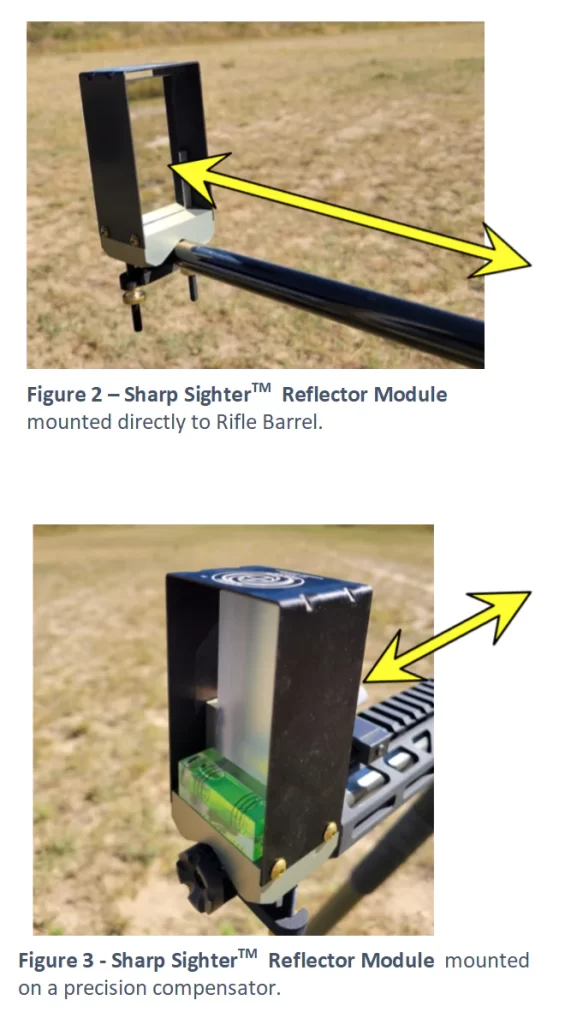
- Fasten the reflector module to the muzzle end of your barrel, with the mirror facing the riflescope as shown. This is a precision mount so use caution and don’t overtighten the thumb nuts.
- Level the Reflector Module using the mounted bubble level.
a. The barrel is inaccessible, due to a for end guard.
b. The barrel is not perfectly cylindrical, as in the case of a fluted, or carbon fiber wrapped barrel.
c. When mounting to a barrel device it is recommended to preplace a crushed washer with a precision washer to improve measurement accuracy.
Step 2.
Illumination Module Installation
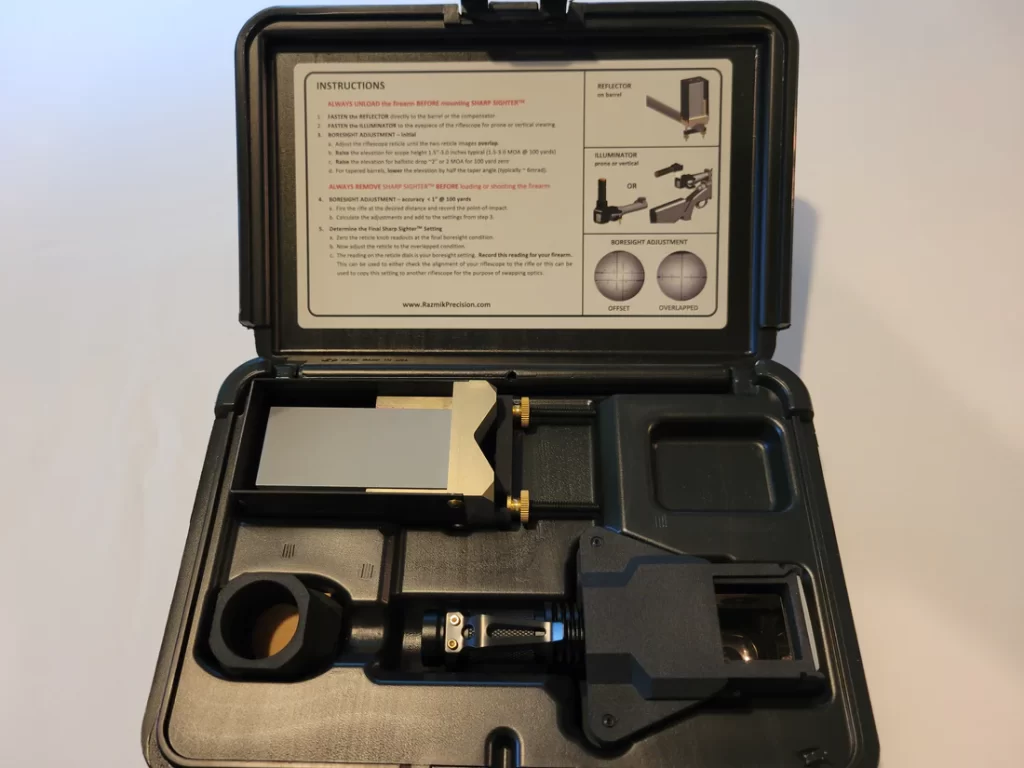
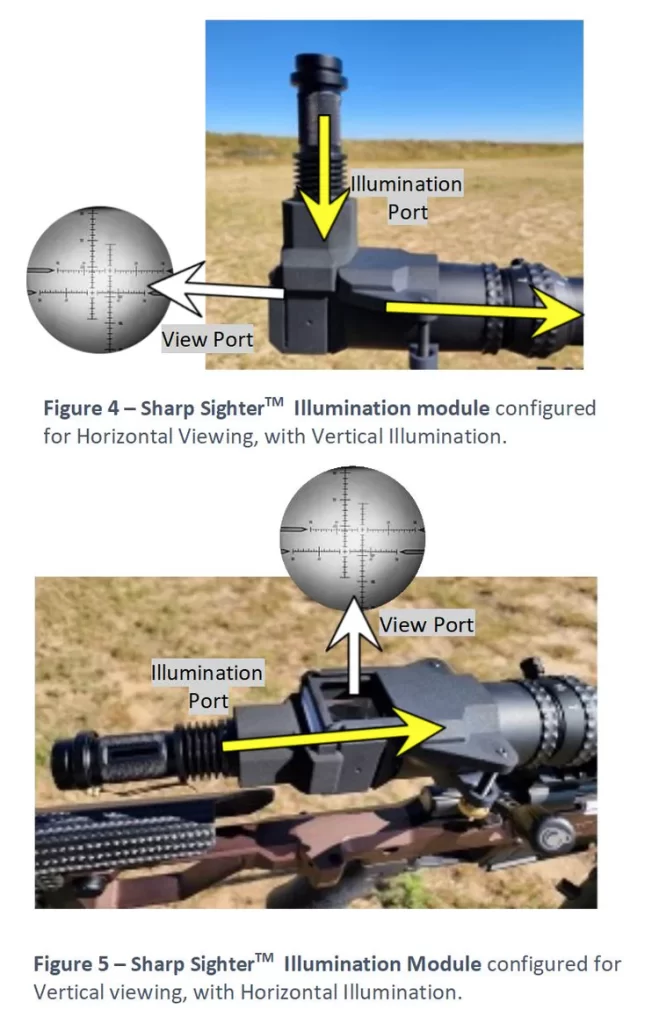
The Sharp Sighter Illumination Module allows light from the flashlight to be introduced into the riflescope. It is attached to the riflescope eyepiece and secured with the two thumb nuts as shown in Figure 4 and Figure 5.
Don’t over-tighten.
It is recommended to wipe clean the eyepiece and the mounting surface of the illumination module to remove grit to prevent cosmetic damage to your riflescope body.
The Illumination module may be assembled and installed in two configurations (besides the storage configuration):
Figure 4 shows the light shining in from the top port of the Illumination Module. In this case the optical diffuser, flashlight holder, and flashlight are mounted vertically as shown. Look directly through the end of the module through the riflescope as you normally would to see the reticle images.
Figure 5. shows light shining through the horizontal end port of the Illumination Module with flashlight holder, and diffuser all mounted on the horizontal port. Look directly through the top port to see the reticle images.
Initial Boresighting
ALIGN RIFLESCOPE PARALLEL to the BARREL
- Focus your riflescope to infinity and dial the zoom down to minimum in order to view the dual reticle image.
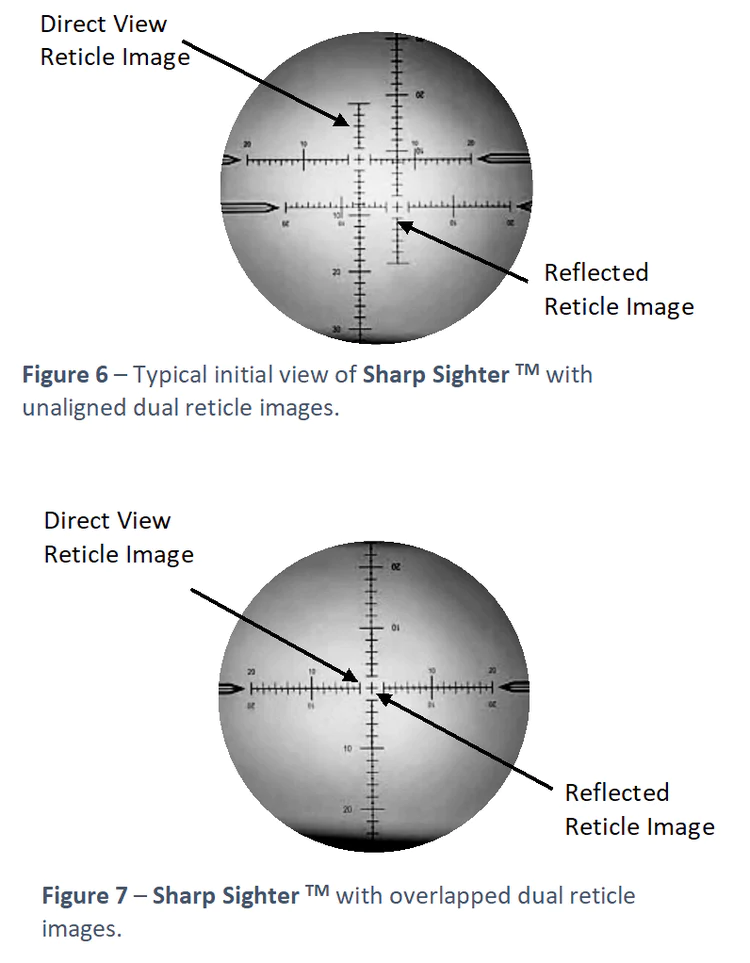
- You should see the Sharp Sighter dual reticle image similar to that shown in Figure 6. One reticle is the normal direct view reticle image while the second reticle comes from the reflector on the barrel.
- You can now zoom in and then fine tune the parallax focus adjustment for best crisp image of the reflected reticle.
- Adjust the riflescope reticle adjustment knobs so that the two reticle images merge and completely overlap as shown in Figure 7.
